Never have parks and gardens been as important as they are in these historic times. After the weeks of #stayathome due to the coronavirus crisis, walks in nature were the first step towards a slow return to normality for many of us – not to mention people's private gardens, outdoor extensions of their living space.
That is why we have chosen to start the new L&L blog section here, with a tribute to nature, which is so important to us (about this blog).
This will be a full immersion into the world of gardens, in three steps. We’ll be shining a light on foliage in this article then, in the next one, focusing on the tree trunks, shrubs, smaller plants and flowerbeds.
In the third we’ll talk about finishes, light colour and coloured light.
But enough chit-chat, let’s get started.
Spot outdoor projectors, 3000K, 6W, 40°
Go to the project and credits
Understanding the setting
We assume that light is able to enhance the strong points of a given space and (literally) put its weaker points in the shade. The first questions to ask are:
How do I want to move around the space?
Where do I want to concentrate my attention?
Which areas do I want to give emphasis to? Which ones do I prefer not to highlight?
In a garden, as with architectural lighting, the light is subordinate to the architecture of the space to be enhanced.
The first point on our imaginary check list will therefore be to understand the setting’s morphology: where we can go full speed ahead and where we need to move more cautiously.
We can judge whether to concentrate the observer’s attention on specific subjects, such as a group of plants, a sculpture, the flowerbeds, a walkway, a fountain if there is one, or the foliage. This will help us to create a mental map of the areas on which to concentrate to avoid confusion and overlapping lighting effects.
Let’s assume that, in a garden, the most spectacular element to be highlighted is the crowns of the trees: we’ll start there.
Tree foliage: how should it be lit?
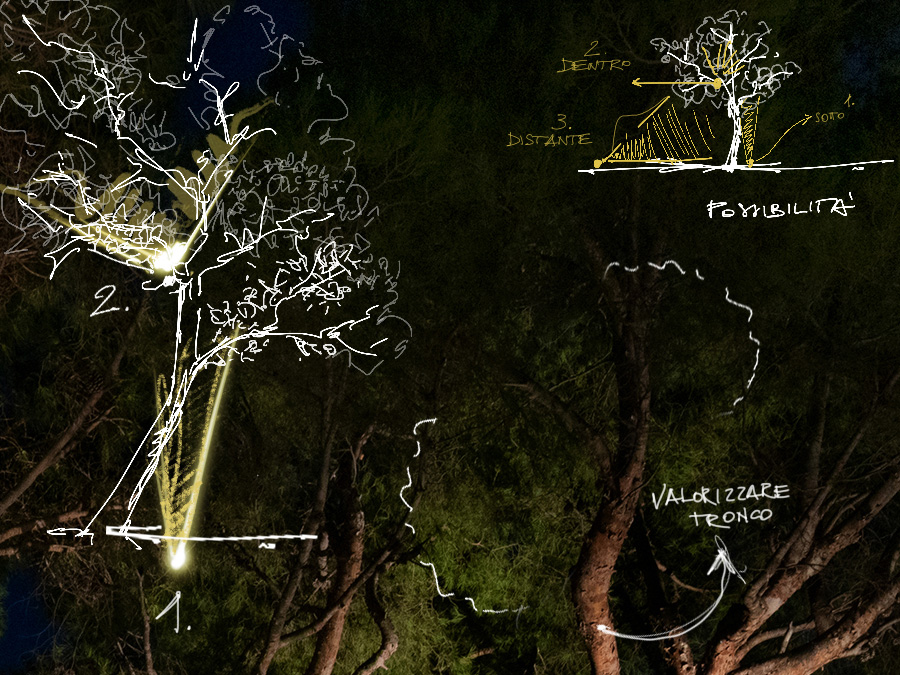
We probably need to open a large parenthesis here: what kind of trees are we talking about? What kind of foliage? As you can probably imagine, every type behaves differently, so an assessment of where to position the lighting fixture needs to be carried out for each one:
below the foliage,
among the foliage,
at a distance from it.
To understand where to position the light, we need to first ask ourselves what lighting effect we want to achieve. Only after that should we ask ourselves where the lighting fixture needs to be to obtain that effect.
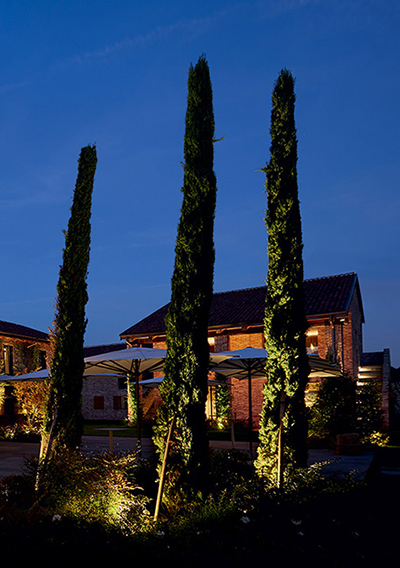
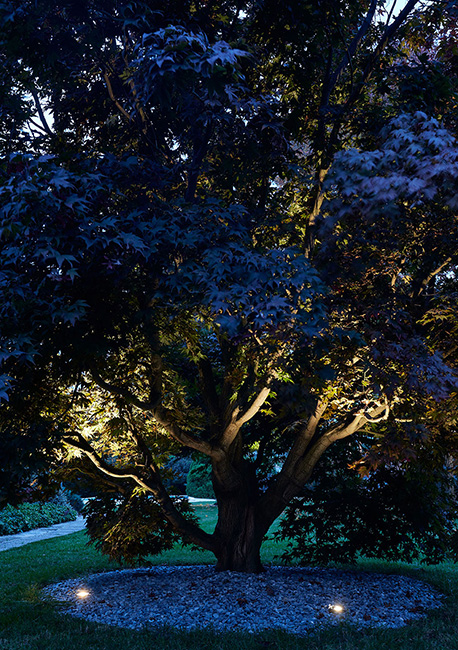
1. Drama Queen
A dramatic effect, usually characterised by a lot of contrast between light and shadow, is associated with a desire to attribute solemnity and majesty to a subject.
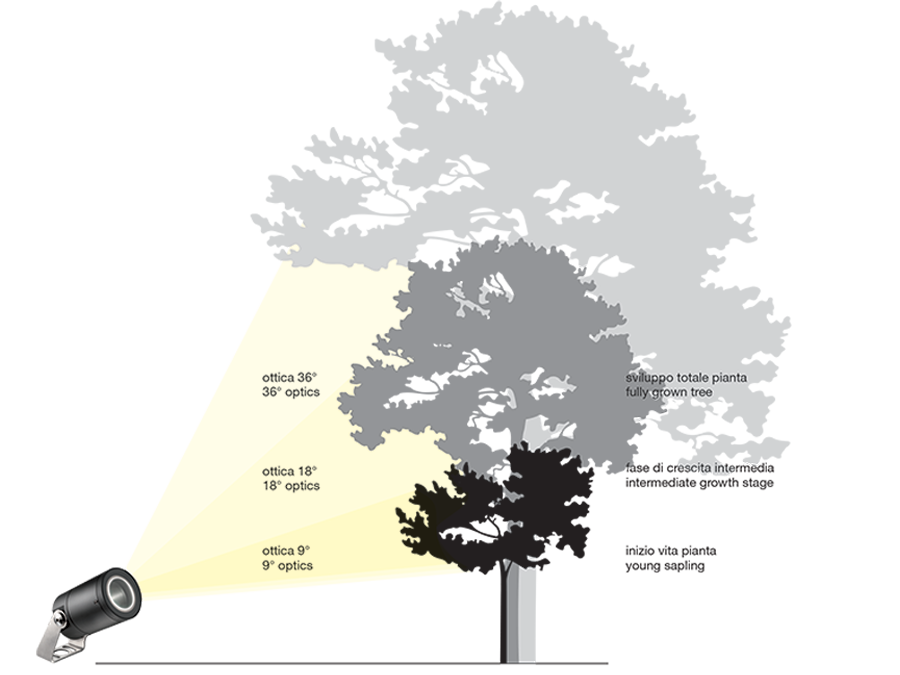
This is particularly used on column-like foliage, such as that of cypresses, which have a compact shape with clean contours. The effect can be achieved with recessed luminaires or projectors with medium-narrow optics, between 10° and 40°, placed at the base of the trunk.
The bottom-up lighting elongates shapes to imposing effect.
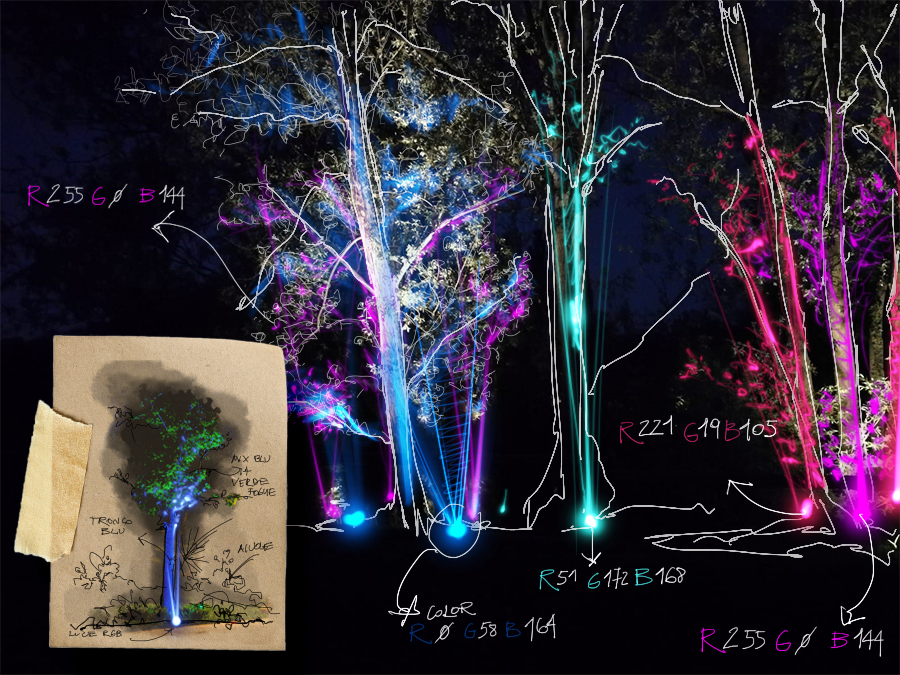
You can add further drama to the scene by working with colours, especially if the light is a deep red :)
Bright 3.G, 2700K, 9W, 35° Go to the project and credits 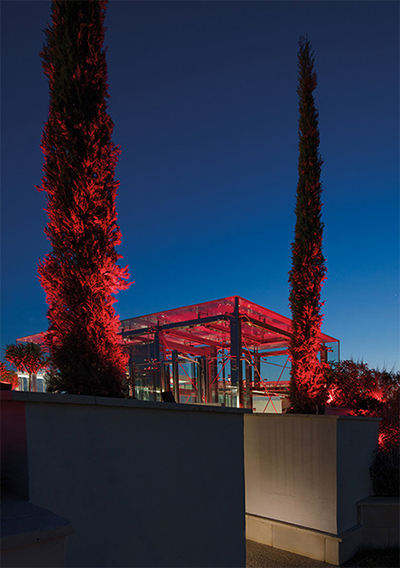
Flori 1.2, RGBW, 13W, 60°, cor-ten Go to the project and credits 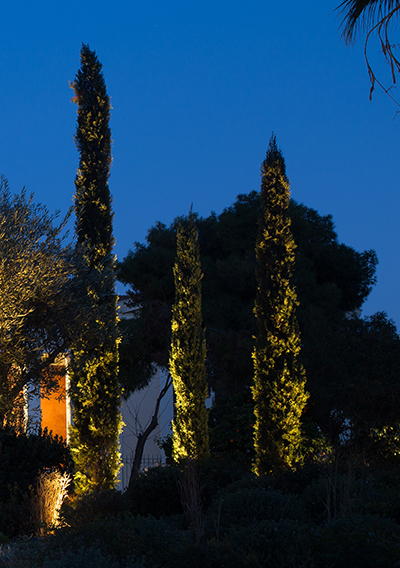
Bright 5.F, 2700K, 19W, 18°, with honeycomb louvre Go to the project and credits
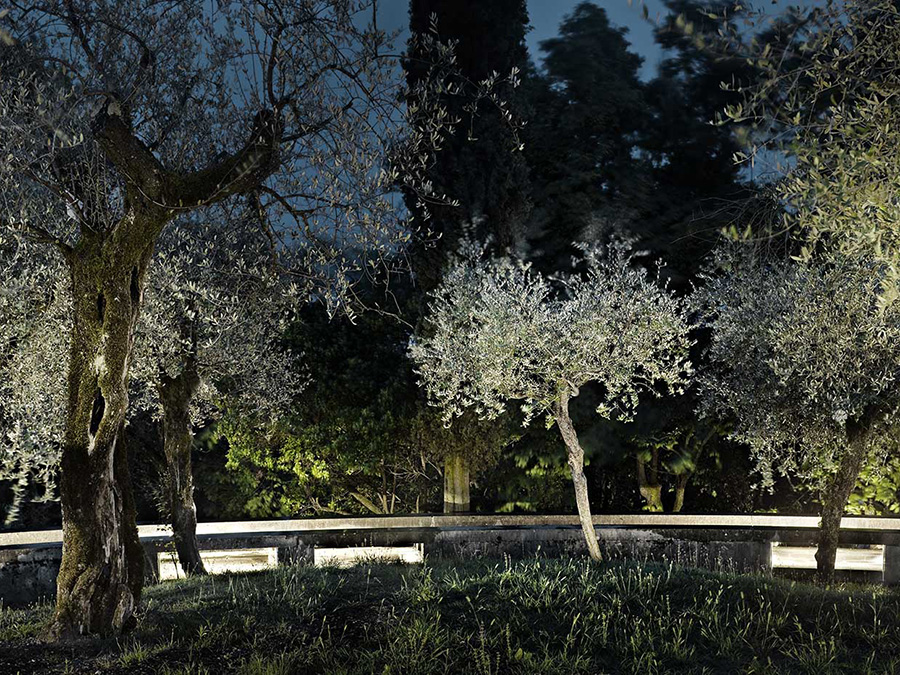
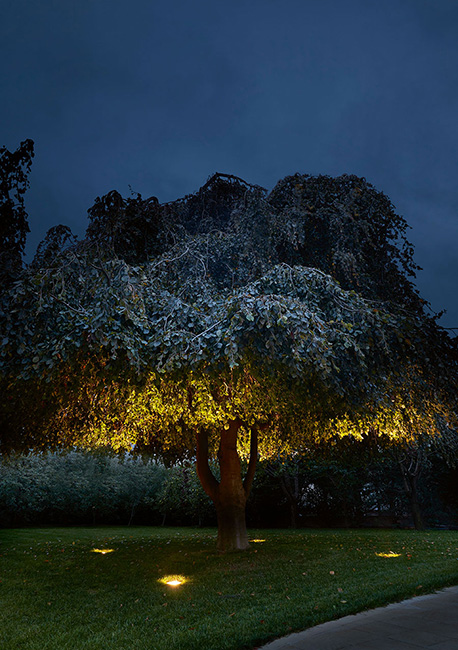
Here, instead, we can see the example of light applied from below to a dome-like canopy, like that of Japanese maples. The serrated outlines of this type of foliage soften the contrast between light and shade, but the overall structure remains clear.
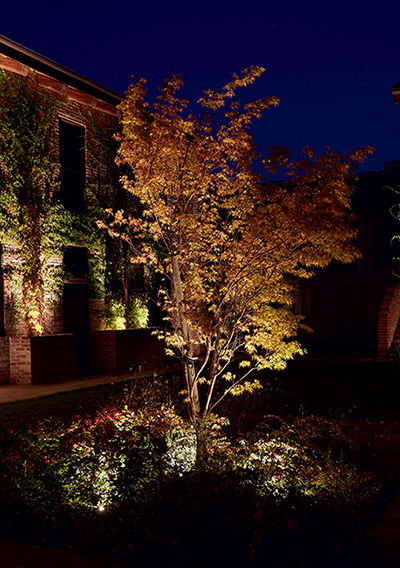
Bright 3.G, 2700K, 9W , 35° Go to the project and credits 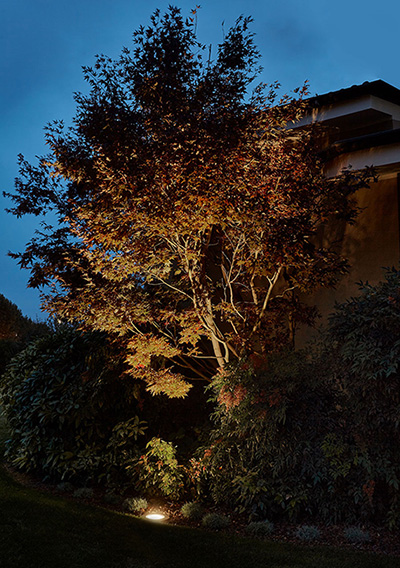
Stra 1.0, 3000K, 37W, 37° Go to the project and credits 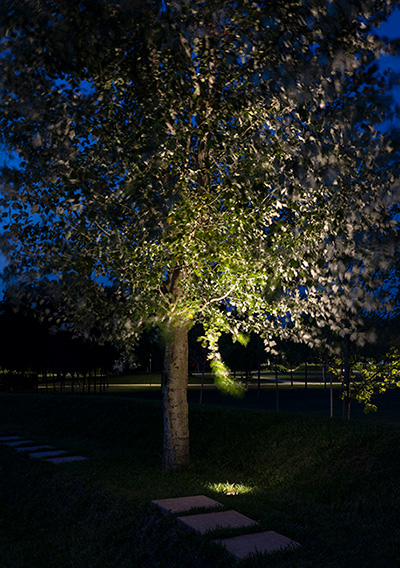
Stra 1.0, 3000K, 37W, 37°, with honeycomb louvre Find out more about the product
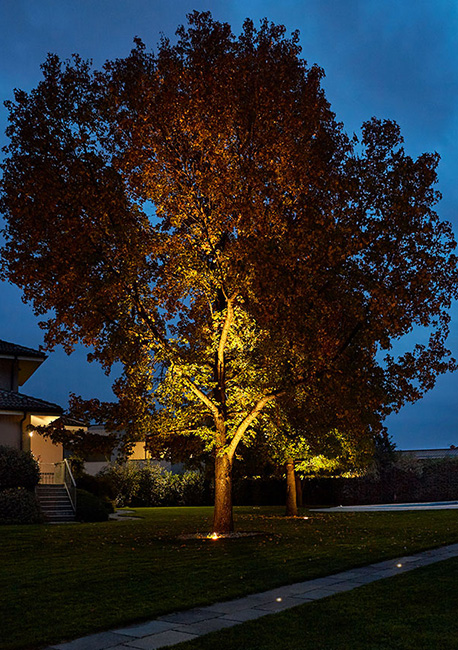
2. Emphasising breadth and shape
If the plant’s shape hinders the passage of light coming from below it, the fixtures need to be set at a distance from the trunk, with an increased number of light points, and wider optics.
In the example on the left, the branching on the plant starts at the base of the trunk, and fixtures with equal intensity, positioned at different points, allow us to appreciate its spread.
In the example on the right, on the other hand, it is the breadth of the foliage, the umbrella-shaped canopy, of the common hornbeam that is being highlighted.
Bright 2.4, 3000K, 7W, 47°, stainless steel Go to the project and credits
Stra 1.0, 3000K, 37W, 37° Go to the project and credits
3. Climbing light
Up to now, we have concentrated on the foliage’s outer shape, as if it were a closed shape. Let us suppose, instead, that a tree's beauty lies in its internal branching and that we are searching for a lighting effect that emphasises its inner part, if necessary leaving the leaves in silhouette (lighting the negative space).
In this case, we can “climb” our light inside the tree, by fixing compact projectors on the branches with fastener straps. These are bands of soft fibres that can be easily loosened or repositioned without affecting the bark in any way.
Stra 1.0, 3000K, 37W, 37° / Spot 3.4, 3000K, 15W, 15°, anthracite, with fastener strap Go to the project and credits
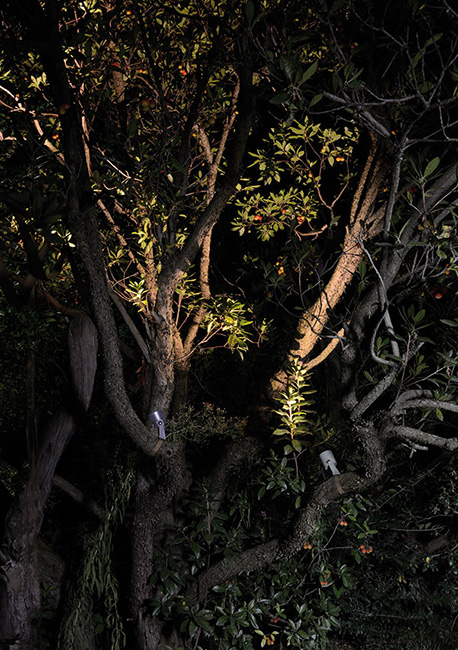
Ginko 2.0, 3000K, 7W, 68°, jasper green - anthracite, with fastener strap
If we like the effect of highlighting the negative space, we need to evaluate whether the tree’s foliage is not too thick and therefore unsuited to housing projectors within it. In that case, we will have to rethink and consider positioning the fixtures below the tree.
4. 3D effect
During the day, the light filtering through the branches creates the impression of a succession of planes; in the dark, however, if we point a projector head-on to foliage, the surfaces will appear noticeably flattened.
We know that positioning is everything when it comes to enhancing the three-dimensional effect.
Sometimes, though, there may be little room for manoeuvre in terms of where the fixtures are installed, and the lighting may be the only variable available.
Does this mean we have to forego a lighting effect that covers the whole canopy?
Certainly not.
We are aided by an accessory that we added to our catalogue in 2017 on the recommendation of lighting designer Francesco Iannone: the shadow-effect filter.
The aim is to create a vibrant, luminous surface that is capable of generating a surprising three-dimensional effect.
Compare the images A and B below, where the bamboo is lit by a 55W projector at a distance of 2.5 m
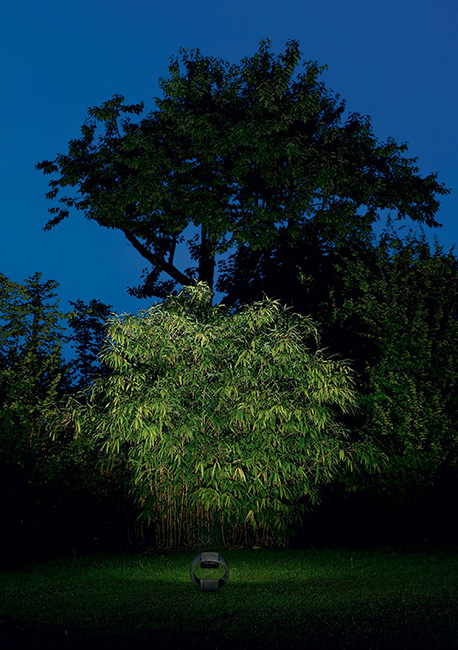
Palladiano 1.0, 4000K, 55W, 85°x85°, anthracite Find out more about the product
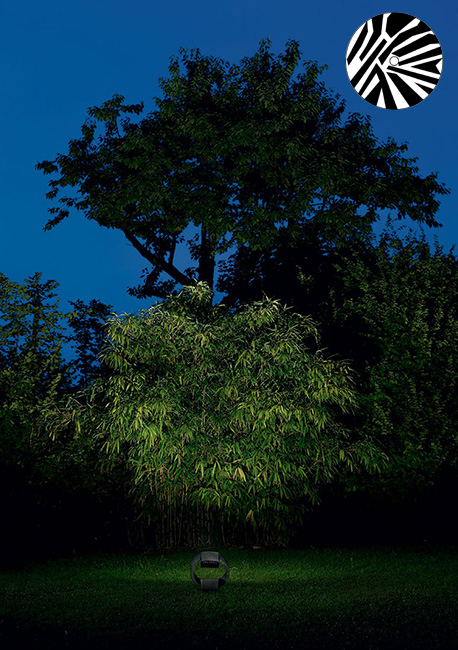
Palladiano 1.0, 4000K, 55W, 85°x85°, shadow-effect filter forest, anthracite Find out more about the product
The foliage is growing and changing shape: do the lighting fixtures need to be changed?
By definition, nature is in a state of becoming, and in a garden this brings with it the need to adapt the lighting fixtures.
To address this age-old question, we have three solutions to offer you:
A. Using projectors with a manual zoom lens: adjusting the body of the fixture as if it were a camera lens alters the width of the light beam (9–36°).
Ginko, manual zoom lens
B. Fixing the projector to a small stake that can then be replaced with a larger one as the tree grows: an additional function for the stake, beyond the more well-known one of raising the fixture above the barriers that obstruct the lighting.
We were inspired by the lighting design by Susanna Antico Lighting Design Studio for Cascina Ranverso: here, the accent lighting on the young trees that line the entrance way from the main gate required the provision of stakes of different lengths so that the light source can be raised as the foliage on the hornbeams grows.
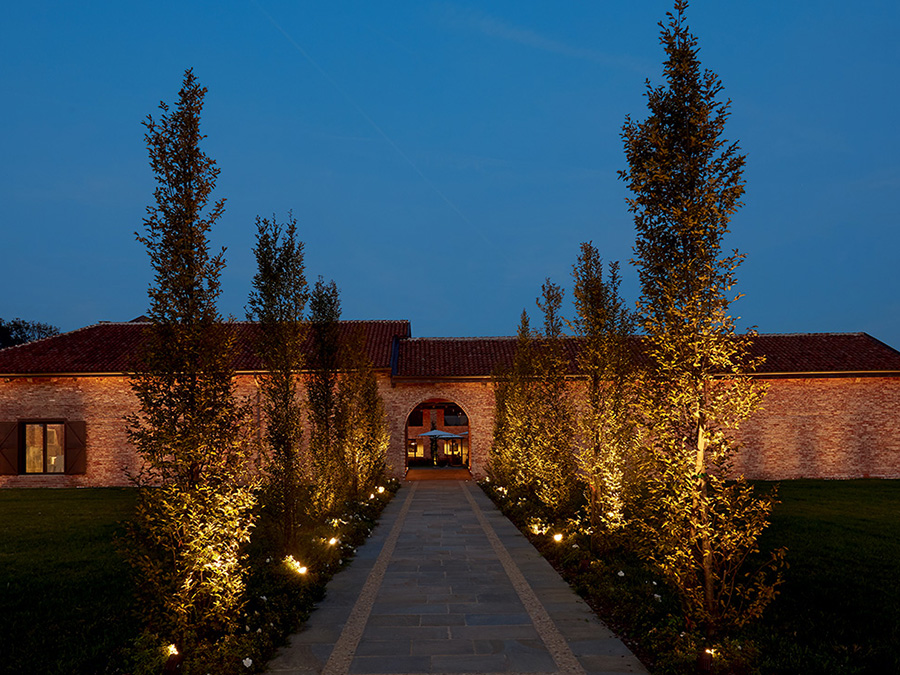
projector for outdoor applications, 2700K, 10W, 30°, cor-ten, with spike for installation in the ground Go to the project and credits
💡 📞 💡
Would you like an adjustable stake? Or perhaps a telescopic one?
Ask us about it, even if you can't see what you want in the catalogue: we can fulfil this and other special requests :)
C. Replacing the optics: if the fixture is one in which the optics can be changed – by replacing a narrow beam with a wider one, for example – this is precisely the type of situation where this functionality comes into its own.
So far, we’ve talked about the different types of foliage and the different ways of lighting them; in the next post, we’ll talk about lighting tree trunks, shrubs, smaller plants and flowerbeds.
Have you used L&L fixtures to light
an unusual tree canopy or used a particular effect to do so?